Sunday, March 17, 2013

Color block jewelry for spring


This weekend I was so lucky to have a whole day to spend with two of my favorite creative ladies, Alisa and Staci. We spent 12 HOURS beading on Friday. When all was said and done, we'd created 36 pieces of jewelry. The above are all of the pieces I got to take home! I made all of them except the long coral and green necklace on the right and the ring on the bottom left. Staci made the long necklace and the ring is actually from our shopping excursion on Saturday to the Funky Zebra, but it fit the collection so nicely, I couldn't resist putting it in the picture too!


I just returned from a work trip to Alexandria, VA. I had some free time that I spent shopping on King Street in Old Town. I picked up three very pretty strings of beads at the Potomac Bead Company. The larger coral beads above were one of my finds. Coral and mint ended up being my theme of the day.


The other theme of the day was color blocking. I have been seeing these styles around and pinned a few inspirations. I saw quite a bit of color blocked jewelry out in DC and knew that I wanted to try my hand at it. I absolutely love all of these necklaces - and chose my outfits the last two days just to wear them! The mint teardrop faceted jade and the coral rose quartz (both on the 3rd necklace) were also from my trip to Alexandria.


I traded Staci for the long necklace in first picture that she made. The two sets of coral earrings on the right went home to Colorado with her!


I have been loving the faceted teardrop shape too so I made a couple of little wire pendants. It's been a long, long time since I attempted wire wrapping and the rose gold wire was very simple to manipulate.


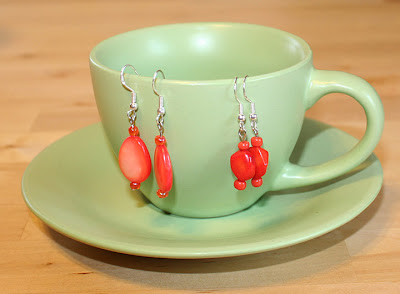
I couldn't get enough of the jade beads so I made some earrings to go with the pendant and/or color blocked necklace. Since yellow slipped in the pallet of the collection in a couple of the necklaces, I just kept going with it. I adore both of these pairs of earrings.


These little wooden yellow beads caught my eye when I was digging for yellow beads for the earrings. With the ombré blue beads, it somehow reminds me of My Little Ponies...but in a good way. Ha!


Sorry for the horrible phone pics on these but I wanted to share what Staci and Alisa made too. For some reason, they didn't let me take of theirs home with me to photograph! The above photo is Staci's creations - 4 bracelets, 2 anklets, and 3 long necklaces.


Alisa is the real jeweler of the three of us and it shows! She cranked out so many beautiful pieces. 5 pairs of earrings and 7 necklaces. I'm not even 100 percent that's all she made! If you ever looking for one of a kind, handmade beaded jewelry, you can find her over a 4 Square Studios.

It was a fantastic day and Alisa is so generous to share her studio, home and stash with us. Thank you, Alisa!

Saturday, January 26, 2013

Oh Deer...I kept your quilt for myself!

Remember when I made my sister the Lady Lattice quilt for Christmas? And then decided to keep it for myself because it goes so nicely in my living room?!? That meant I had very little time to crank out another quilt for her before Christmas. I had already finished her twin brother's quilt and couldn't give him his without one for her!

I bought a jelly roll and charm pack of Oh Deer by MoMo for Moda at the Wisconsin Quilt Expo last year.


It was a treat for me to make something for myself because I loved the prints and colors dearly (hehe. pun.) So I decided it would be a fair trade to make her an Oh Deer quilt instead of me since I had stolen her first one for myself!

This is the first time I had even bought a jelly roll (40 strips of 2.5"x44" of coordinating prints). In the words of my friend Alisa, jelly rolls are "juicy." They are soooo juicy! They feel great in your hands, are so fun to unwrap and a breeze to work with. I can feel a new addiction coming on...

Anyway, back to the quilt.


It was quick to make and I love how bright, busy and fun it is. I just sewed all but about 6 strips of the jellyroll together in a somewhat random order. Then I cut about 10 inches off one side. I sewed the squares of the charm pack into two rows and pieced that between the two striped pieces. I did the whole top in an afternoon. 


For the quilting I did a meandering pattern, trying not to have any cross overs. 


This quilt was well received by my sister. She called and told me that roommates and guests to her house have all commented on it and she really loves it. That makes me really, really happy and feel a little less guilty that I am sitting under the quilt I made for her first but kept!

Saturday, January 19, 2013

Window Panes - Rain or Shine

I made both of my siblings quilts for Christmas this year. I am really happy with how they turned out. I named this pattern Window Panes...for obvious reasons. When I finished, I realized that was even more appropriate with the sunny yellow and cloudy gray color scheme.


A year or so ago, my brother mailed me fabric to make him some pillows. Whatever I had for leftovers, he said to just put in my stash. I knew I wanted to make him a quilt with the scraps. A couple of random charm packs and yardage from my stash later, the only fabric I ended up having to buy was the wider sashing between each "window."


My brother picked out the houndstooth, music note fabric, gingam and a few of the others. I'm so happy with the result but sad I forgot to get a picture of him with it on Christmas!


For the back I used another vintage sheet with gray and white stripes.


The binding and quilting are bright yellow and I quilted my trusty meandering bumble bee pattern. So relaxing to long arm this one!

Sunday, November 4, 2012

Lady Lattice Quilt


When I had the idea for this quilt, I thought it would be very simple. Cut a bunch of fat quarters into 2, 3 and 4 inch strips. Sew them together in random order. Cut strips and piece together. Ta Da! So easy, right? HA! Not so much. While the first steps of cutting strips, sewing them together and cutting rectangles from the big striped pieces was a breeze, cutting and piecing the rest of the top SUCKED! I learned that triangles and 45 degree angles are not for me.

Thankfully, the final product turned out beautiful! This is seriously one of my favorite quilts I've ever seen - and I made it! I will, however, never do this patter again!


I used a vintage sheet for the back. When it came time to actually long arm the quilt, I didn't want to add a whole lot tight stitching as the pattern is already fairly busy. So I created a large scale loop-de-loo pattern (yes, I am fairly sure that is the technical term!).


You can see the quilting really well on the back but it blends in fairly well on the front.


I am in love with the end result. I am giving this to my sister for Christmas but it will be extremely hard to part with. I hope she appreciates the time and effort (and frustration!) that went into this gift. Update: I just couldn't do it. I am keeping this quilt for me! Shhhhhh, don't tell Kelly! I am sitting under it right now!


I LOVE the fabric that I used for the stripes. (Thank you, Meredith!) It's Emperor's Garden by Maywood Studios.


The solid fabric was another vintage sheet. (Thank you, Alisa!) And as always, a HUGE thank you to Gloria for letting our QA club take over her kitchen and studio for long arming every few Sundays.

Saturday, September 22, 2012

Inkodye to die for

Have you heard of Inkodye? It's light sensitive dye that you can use on fabric, natural wood and so much more. My awesome MIL got me 3 colors and I've been having a blast experimenting with them.

For our first try, my friend Alisa and I decided to dye canvas and go with an art/sewing/crafting theme. I covered large pieces of cardboard with garbage bags and wrapped the fabric around, securing it with tape. Mix the Inkodye with water and brush it on.


Now comes the fun part! Place cutouts or found objects (the flatter the better) in a pleasing pattern on the fabric and take it outside to sit in the sun. I used buttons and Alisa used art supplies.


While the dye goes on clear, it starts to change color immediately in the sun. In full sun, the dye takes less than 10 minutes. On a cloudy day, a bit longer. We did ours in late afternoon (see how the items are casting shadows?) This is not ideal. Next time I'll do it when the sun is straight overhead. But our first try fabric still turned out really cute and we had a blast!


I'm calling mine "ghosty buttons." Because of the shadows the low sun cast, the buttons aren't as sharp as they could be but overall I still really like the effect.


Alisa's art supply inspired fabric turned out really cool too! Some of the smaller objects didn't work as well, but I love that you can see the markings and text from the clear ruler and triangle she used.

We haven't made anything out of our fabric yet, but we are thinking of making crafting utility aprons. I am also considering making a cushion for my sewing chair out of the button fabric, but the blue really doesn't go in my studio space. I'd love to hear any other ideas of what we should make - leave suggestions in the comments!

Monday, July 9, 2012

We looked! Then we saw him step in on the mat! We looked! And we saw him! The Cat in the Hat!

Have you seen the Dr. Seuss prints from Robert Kauffman? There is a Cat in the Hat and Lorax set. My friend asked me to make a quilt for her little Baby B that arrived earlier this month (Baby B turned out to be Miss Hathaway Jane!) She gave me a fat quarter set of both lines (both colorways for the Lorax!). She wanted me to use the Cat in the Hat fabric for her and the Lorax fabric I get to keep. The Lorax is one of my all time favorite books. I haven't quite decided what I'll make with the fabric, but I am leaning towards another quilt - for me!

This post is supposed to be about the quilt I made her, so I'll stop rambling about the Lorax fabric. (Can you tell I'm excited about it?!?)

There were a couple of difference challenges with this quilt. First, the fabrics are all adorable but a bit busy. Second, my friend wanted something that could be folded and work for a crib but would also work more long term as Baby B grows into a toddler then "big kid." We decided together that something long and narrow would fit both needs - then I discovered the two big panels in the bundle were long and narrow, so it worked out perfectly.

I am not a good pattern follower. I like to make things up as I go and see where it takes me. The Cat in that Hat is zany and a bit crazy, so I decided the quilt needed to be too. As I said before, the fabric is busy so I didn't want that to become overwhelming. So I stuck with larger blocks of the fabric, and just turned everything to a 45 degree angle. I am really happy with the results.


What do you think? Squaring the quilt and appliqueing the center panel on were by far the biggest challenges.

I also wanted to use both big panels that came in the bundle so I did just a little something on the back.


I basically used every scrap of fabric in the entire fat quarter bundle and it worked out perfectly. I quilted my favorite go to "pattern" of meandering bumble bee. It goes nice with the straight lines of the quilt and its so simple to do, you can't mess it up!


Sunday, July 1, 2012

Envelope pouch


This past weekend I was feeling inspired to make something for a friend's birthday. I had no real concept of what I wanted to do until I saw an A7 envelope sitting on the filing cabinet in my studio. I thought it would make for a cute clutch/pouch, so I opened it all the way up and used it for a "pattern."


The birthday girl is a big fan of coral and leopard/cheetah prints. Both of these fabrics were in my stash. There is one layer of quilting batting that I fused to the lining with heat n bond. Fusible batting would have been one less step, but I didn't have any on hand.


 I had about 20 minutes before I needed to give the gift, so of course, I decided it was necessary to make another item to go with it. I decided a little zipper pouch that fits perfectly inside would be nice so small things like change wouldn't escape if it was carried alone as a clutch.


I'm really happy with how it turned out. The different textures of the fabrics work well together and I love the little vintage coral button for the envelope closure. The gift was well received and I think I'll have to make more of these babies someday soon.

LinkWithin

Related Posts with Thumbnails